AirTouch N20
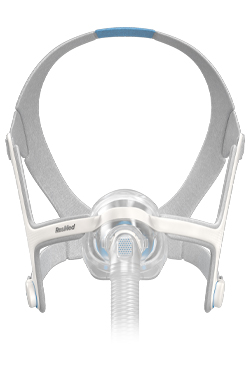
Our softest nasal mask ever
- ResMed UltraSoft™ memory foam adapts to the contours of each face, creating a personalized fit and unique comfort experience.
- Plush headgear is specifically designed for extra softness and stability.
Designed for simplicity
- Magnetic clips guide the headgear to the frame quickly and easily.*
- Quick-release elbow makes it simple to disconnect from the tubing without removing the mask.
- Modular frame is designed so that the memory foam cushion can be swapped out easily with a ResMed AirFit™ N20 InfinitySeal™ silicone cushion.
- No cushion cleaning required with regular replacement. Studies show that AirTouch™ mask cushions are hygienic to use for one month without cleaning.1-3
1 ResMed AirTouch F20 bioburden safety analysis of foam cushion: 45-day assessment of 20 evaluable participants (in place of usual CPAP mask.) July 9, 2009, to July 20, 2010, in Sydney, AU.
2 ResMed AirTouch F20 bioburden safety analysis of foam cushion: 60-day assessment of 14 evaluable participants. (in place of usual CPAP mask) July 9, 2009, to July 20, 2010, in Sydney, AU.
3 ResMed AirTouch F20 bioburden safety analysis of foam cushion summary: combined results from 45 and 60-day assessment of 34 evaluable participants. March 26, 2019, in Sydney, AU.
* Magnets may interfere with certain implants or medical devices. Please refer to the User Guides for complete information, including magnet contraindications and warnings.
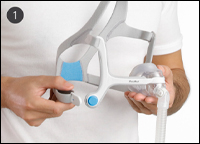
- Twist and pull both magnetic clips away from the frame.
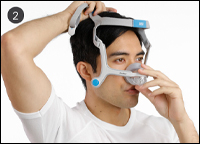
- With both lower headgear straps released, hold the mask against the patient’s face.
- Pull the headgear over the patient’s head, ensuring that the ResMed logo on the headgear is facing up.
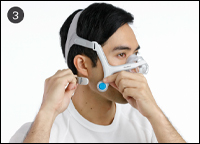
- Bring the lower straps below the patient’s ears and attach the magnetic clip to the frame.

- Undo the fastening tabs on the upper headgear straps.
- Adjust the straps evenly until the mask sits comfortably just over the nose.
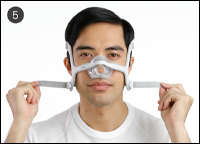
- Undo the fastening tabs on the lower headgear straps.
- Adjust the straps evenly until the mask is stable.
- Reattach the fastening tabs.

- Connect the air tube on the device to the short tube.
- Attach the elbow to the mask. First, press the elbow’s side buttons, then push the elbow into the mask, ensuring it clicks in on both sides.
- Start the device.
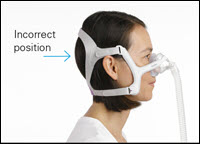
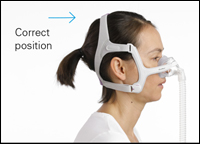
Refer to the user guide for further instructions and complete labeling information, including indications, contraindications, warnings and precautions.
| Complete mask system | |
|---|---|
| Small | 63903 |
| Includes frame system, cushions and headgear | |
| Medium | 63901 |
| Includes frame system, cushions and headgear | |
| Large | 63902 |
| Includes frame system, cushions and headgear | |
| Headgear with headgear clips | |
| Small | 63560 |
| Standard | 63561 |
| Large | 63562 |
| Frame system | |
| Includes frame, cushion and elbow with short tube | |
| Small | 63953 |
| Medium | 63955 |
| Large | 63956 |
| Cushion | |
| Small | 63950 |
| Medium | 63951 |
| Large | 63952 |

Removing
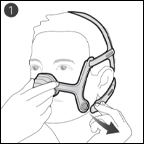
Twist and pull both magnetic clips away from the frame.
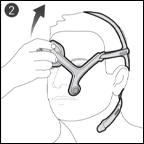
Pull the mask away from their face and back over their head.
Disassembly

Undo the fastening tabs on the upper headgear straps and pull them from the frame. Keep the magnetic clips attached to the lower headgear straps.

Remove the elbow from the mask by pressing the side button and pulling the elbow away.
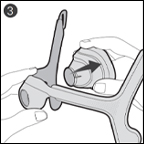
Hold the frame by placing a thumb over the side slot. Pull the cushion away from the frame.
Reassembly
- 1. Push the cushion into the frame. The frame shape only allows for the cushion to be inserted one way.
- 2. With the ResMed logo on the headgear facing outside and upright, thread the upper headgear straps into the frame slots from the inside. Fold them over to secure.

